- New Arrivals
- Brands
- Apexium
- Artery
- Aspire 🔥
- Atman
- Avatar
- Bohr
- Chromium Crusher
- Chubby Gorilla
- Coilmaster
- Digiflavor
- Efest 🔥
- Eleaf
- Eonsmoke
- Famovape
- FreeMax
- GeekVape
- Grand Vapor Mods
- GTRS
- Hamilton Devices
- HCigar
- Horizon Tech
- Hyde
- iJoy
- Innokin 🔥
- Joyetech 🔥
- Justfog
- Kado Vapor
- KandyPens
- Kangertech
- Killa Fruits
- Levo
- Lithicore
- Lost Vape
- MIO
- MLV
- Native Wicks
- Nemovape
- Nitecore
- OBS
- OFRF
- Omni
- Orchid Vape
- Oukitel
- Ovanty
- OVNS
- Pax
- Pioneer4you
- Pluto
- RELX
- Rincoe
- Sense
- Sigelei
- Smoant
- Smoking Vapor
- Smokjoy
- Smoktech 🔥
- Suorin
- Tesla
- Twisted Messes
- UWELL 🔥
- Vandy Vape
- Vaporesso
- Vaptio
- Vicious Ant
- Voi
- Voopoo
- Wake Mod Co.
- Wick N Vape
- Wismec
- Wotofo
- Yocan
- Youde/UD
- Vape Bar
- pyramex
- Coil Home
- Coil Home
- Quawins
- Rare
- Flum Float
- Vibez
- Mosmo
- Ifrit
- LD Disposables
- Dotmod
- Air Stix
- Vozol
- Starter Kits
- E-Liquids
- District One21
- The Big 100
- Nicotine Salt Eliquid
- Plain Menthol
- Plain Tobacco
- Shop By Flavor
- Tobacco-Free Nicotine
- The Milk
- 7 Daze
- 80V Eliquid
- ADE Juice
- Aime Pods
- ANML Vapors
- Aqua
- Bad Drip Labs
- Bam's Cannoli
- Batter'd
- Beantown Vapor
- Beard Vape Co.
- Berry Goodsicle
- BLVK E-Liquid
- Bubble Gang
- Buckshot Vapors
- Burst
- Caesar
- Cafe Racer
- Cali Pods
- California Grown E-Liquids
- Candy Pop!
- Cassadaga Liquids 🔥
- Charlies Chalk Dust
- Chubby Bubby Vapes
- Citricity
- Cloud Nurdz
- Clown
- Clutch Vapors
- Colors E-Liquid
- Cosmic Fog
- Creme De La Creme
- Crisp
- Crisp Salts
- Cuttwood 🔥
- Dinner Lady
- Dr. Shugar Chitz
- Draco Vapors
- Element E-Liquid
- Famous Fair
- Fantasi
- Fresh Pressed
- Fruit Monster
- Fruit Pop!
- FRYD
- G2 Vapor
- Gemini
- Gost Vapor
- Grimm Creations
- Hedz
- High Caliber
- Honest Eliquids
- Humble Juice
- I Love Salts
- Import eLiquid
- IQ Pods
- Jam Monster 🔥
- Juice Head 🔥
- Junkie Juice
- Kilo E-Liquids
- King's Crown
- Lemonade Monster
- Liquid State
- Loaded
- Lost Fog Collection
- Mad Hatter Juice
- MET4 Vapor
- Modus Vapors
- Moo E-Liquids
- Mr. Good Vape
- Mr. Salt-E
- Naked 100 🔥
- Nasty Juice
- Nomenon
- OKAMI Brand
- OMG E-Liquid
- One Hit Wonder
- Opmh Project
- Overloaded E-Juice
- Pacha Syn
- Phillip Rocke
- Platinum Collection
- Pod Juice
- Pop Clouds
- Prism
- Proven
- QPODS
- Qurious
- Ripe Collection
- Rockt Punch
- Royal Bishop
- Ruthless
- Sadboy E-liquid
- Vape Tanks
- Vape Devices
- Accessories
- Herbal
- Sale

The Electronic Cigarette Super Store
15% Off Select E-liquid Brands With Code: EXCLUSIVE Shop Now
When To Upgrade To Temperature Control VapingIf you’re still vaping exclusively with starter kits, you’ve more than likely considered upgrading to a progressive MOD or Personal Vaporizer with temperature control. Advanced users prefer them for a reason, right? Well, before you purchase one of these relatively technical devices, we’ve broken down the various benefits of Temperature Control (TC) vaping, along with the required steps to make the equipment upgrade. WHAT IS IT?What Is Temperature Control & How Does It Work?TC vaping ultimately allows users to adjust how much they heat up their eLiquids. The different temperatures provide various benefits, which we’ll discuss as we move on. This adjustable heat allowance is determined by the resistance of the metal coil in your tank or dripper. Resistance is determined by the type of metal used in the coil. That’s why coils used for TC vaping use different types of metal than non-TC coils. The metal material used on TC coils are chosen specifically because their temperatures rapidly increase as they’re heated up. All Temperature Control MODs and PVs allow users to adjust how much their coils are heated up, with heat variability depending on the unit. Most units include TC settings to make finding the ideal temperature easy, targeting the resistance immediately and continually monitoring it as users vape. As the coil heats up and resistance rises, the TC device sees this as a temperature change. Every TC device offers the ability to set a target temperature, and the device will adjust to that temperature, as users vape. Most vaping temperatures range between 100°C - 300°C / 200°F – 570°F. Most devices typically allow adjustments in increments of 5°C or 10°F. THE BENEFITSWhat Are The Benefits Of Temperature Control?Longer Life For Coils and WicksThis benefit is fairly obvious. In Temperature Control vapes, the device is smart enough to regulate usage of coils and wicks, preventing them from burning out too soon and allowing maximum usage from every accessory.Temp Control devices provide a more efficient vaping experience and save users money over time. 
Minimizing Dry HitsDry hits are commonplace in the vaping world. These burnt drags happen when our tanks run empty, or when we forgot to add juice to our dripper. However, in Temperature Control vapes, dry hits aren’t allowed. Instead, the temperature control functionality will start to power down the device before allowing the scratchy hit. So, opposed to getting a gross hit, you actually get little to no vapor. Extra Battery LifeOne of the most straightforward benefits of Temperature Control devices is they offer much longer battery life than Variable Wattage alternatives. The reason for this is because they’re specifically made to dynamically heat your coil at ideal temperatures, restricting overheating in most cases. THE REQUIREMENTSRequirements For Temperature Controlled VapingMOD Or VaporizerYou cannot be Temperature Control vaping without a TC-enabled MOD or vaporizer. Most of them have various options to set them apart from another - ranging from higher wattage allowance to bigger decks for easier coil builds - but all of them follow the same core functionality described above. 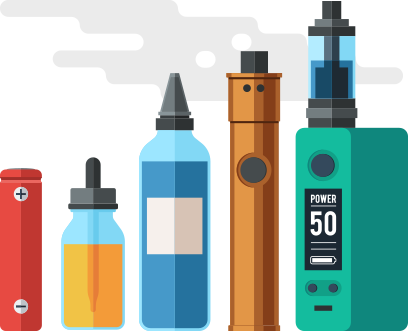
Wire For CoilsOnce you’ve chosen the ideal device for Temperature Control vaping, the next thing you’ll need is wire for your coils. There are three main types of wire for coils - Nickel 200 (Ni200), Titanium (Ti), and Stainless Steel (SS). Nickel wire must be used in Nickel TC Mode. Titanium wire must be used in Titanium TC Mode. Stainless Steel may be used in either Wattage (Power) or Stainless Steel TC Mode. 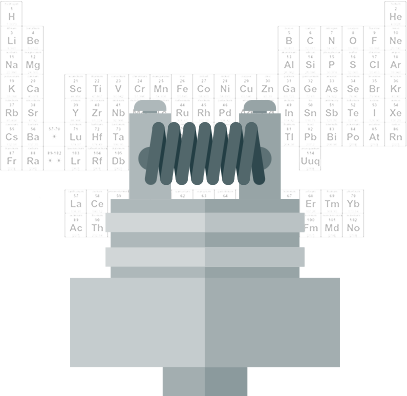
Pre-Built CoilsIf you’re not comfortable using wire to build your own coils, most manufacturers offer pre-built temperature control coils/atomizer heads that are easily to use and implement. VIEW OUR COILSSTEP-BY-STEP GUIDETemperature Controlled Vaping
1
Activate Temperature Control ModMost MODs or Vapes offer three different TC modes – Nickel, Titanium and Stainless Steel. Once the device is turned on, you’ll choose the mode based on the coil you’re using. Nickel wire must be used in Nickel TC Mode. Titanium wire must be used in Titanium TC Mode. Stainless Steel may be used in either Wattage (Power) or Stainless Steel TC Mode.
2
Install Your CoilWhen locking the coil into place, make sure it’s screwed down tightly and close to the device as possible.
3
Install The Tank & Lock Your ResistanceOnce the coil is in place, install the tank or dripper on the MOD securely. Be sure not to over-fasten your tank or dripper. Before adjusting your settings, be sure that your coil is at room temperature and has not been fired. Then, you can proceed to locking/setting your resistance. With most TC devices, you would hold the wattge up/down buttons together for a few seconds. This will allow the device to read the current state of your coil and make adjustments based on the resistance. Once your resistance is set, you are ready to adjust your wattage setting. Note: You must reset your resistance if you change your coil or if you remove your tank.
4
Choose Your Target TemperatureTemperature is based on personal preferences. If your temperature isn’t providing ideal vapor production, try different temperatures and find one that works best. If your juice is running out too fast, simply turn the temperature down and you’ll stop burning through the juice so quickly.
5
Set WattageWhile there is no true base wattage, most users recommend starting your Temperature Control device on a wattage around 20-30W. From there, users can adjust the wattage to their own personal preference. Don’t go too low though, otherwise the device won’t heat up properly. The Industry’s Largest SelectionNow that you understand how Temperature Control vaping works, let’s get started! My Vapor Store offers the industry’s largest selection of Temperature Control MODs, PVs, TC Coils, Tanks, Wire and other accessories. SHOP NOWBrowse Our Most Popular Categories: |
We Accept:


